
Personally, I have been always adjusting my bike setup according to my feelings. I thought I was quite accurate but only when I did my first professional bike fitting at the age of 42 I understood how much better it was. So, if you are churning out a lot of miles, I recommend reserving a bike fitting session with a professional.
On the other hand, if you are more of a hobby rider or you do not have the budget to do that (the average price is around 150/200 euro), I will try to share some key tips on how to do a DIY bike fit. I will try to keep it very simple to not to discourage you from doing it. This, of course, will not substitute the help of a professional, it will just give you a starting point, so be prepared to a lot of “feel and tweak” before you reach a comfortable position.

Start with shoes!
Before touching the bike and starting your DIY bike fit, you must work on your cleats’ alignment. In fact, if your bike is set up perfectly but your cleats are not, you will compromise the whole procedure. Misaligned cleats can cause a lot of different problems including pain in your lower back.
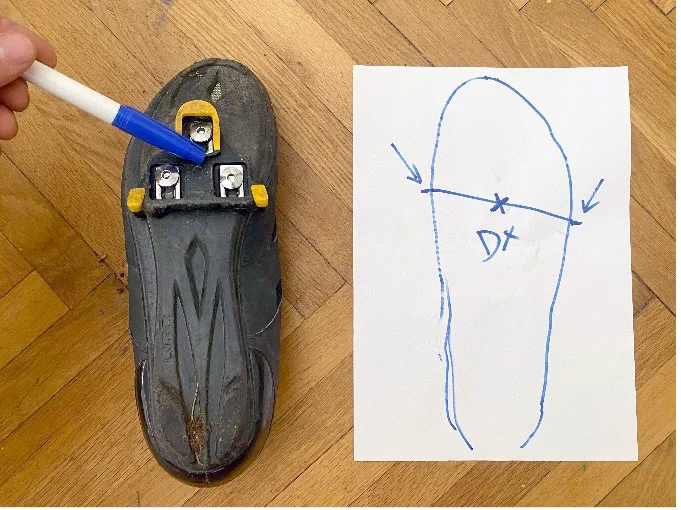
First, you need to find the right cleat position. To do that, you need to draw a line between the bony protrusion on the inside of your feet and the one on the outside. Once you do that, the midpoint on that line will be where to place the centre of the cleats.

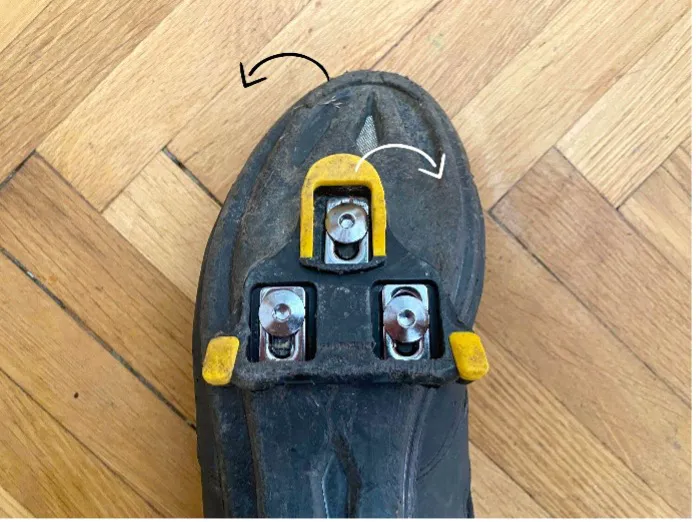
After that, you need to adjust the angle. For example, my feet naturally turn slightly outward (duck feet) so when I set my cleats, I need to consider that and compensate for it.

Saddle height and fitting
Time to jump on the bike and work on your position. If you don’t have a bike stand or somebody who could help you holding your bike while you are on it, you can just lean against a wall. The first thing to check is the saddle height. The rule of thumb is to put your heel on the pedal, move the pedal to the lowest point and make sure that your leg is not fully stretched but only slightly bent.
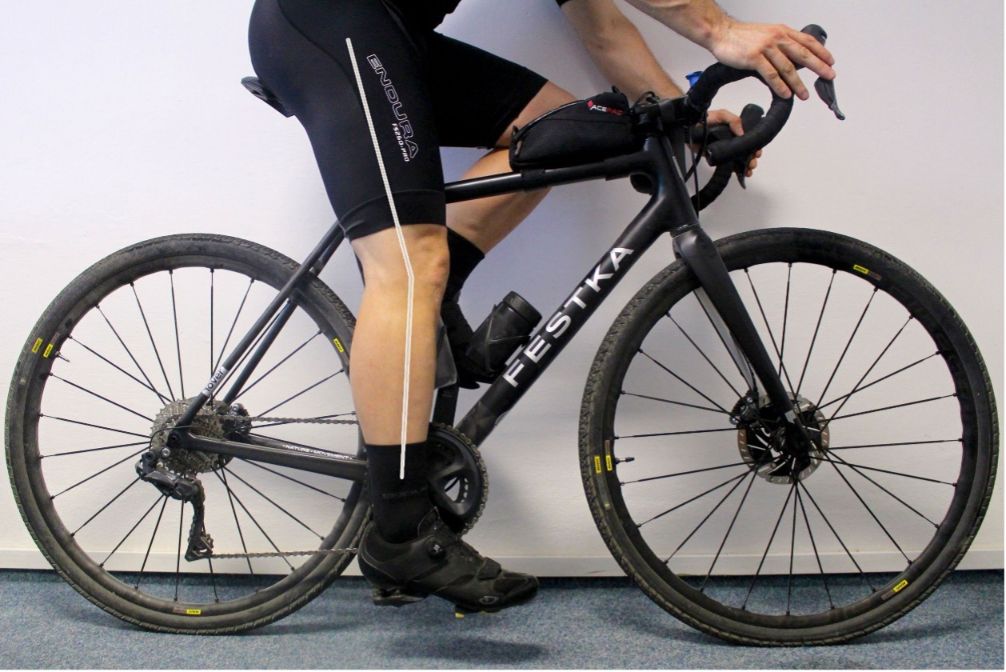
The next thing to do is to adjust the saddle position and angle. Let’s start with the position. What you want to achieve here is to have the knee cap of your forward leg aligned with the pedal spindle while the cranks are in a horizontal position. So, try to achieve that by moving the saddle forwards or backwards. Once your saddle position is correct, the last thing to play with is the angle. The standard position is a flat position. You can use a bubble level. If you don’t have one, there are many apps for smartphones that could help you with that. For a more comfortable position, the tip of the saddle should be slightly nosed up (1 degree). This way, the weight will be on your butt and not on your arms/shoulders. For a more aggressive climbing position, go slightly negative.


Handlebar fitting
You are almost done, the last thing left to do is to take care of your handlebars. They should be in a neutral position or slightly angled up. When they have a downwards angle, it will make your arms numb, which is one of the most annoying sensations while riding.
That’s it, your bike is now fitted to your body. As mentioned above, each of us has a unique body and a different riding style so you will need to observe yourself and apply a few micro-adjustments but at least you now have a solid starting point. Enjoy riding!


